By: Plants and Home
Starting plants from seeds indoors is a rewarding and cost-effective way to grow your garden. Whether you’re hoping to start vegetables, flowers, or herbs, beginning seeds indoors gives them a head start, ensuring a strong, healthy start when it’s time to transplant them outdoors. If you’re new to indoor gardening or just looking for some tips, this guide will help you navigate the process of starting seeds indoors with success.
Heads up!
Some of the links on this blog are affiliate links, which is a fancy way of saying I might earn a tiny commission if you click and buy, at no extra cost to you. I only recommend stuff I use and love (no junk). These little earnings help keep the blog alive, the coffee flowing, and the dog treats stocked. Thanks for supporting what I do!
1. Why Start Seeds Indoors?
The Benefits of Starting Seeds Indoors:
Starting seeds indoors offers several advantages, especially for regions with short growing seasons. By starting early, you can:
Extend the Growing Season: Give plants a jumpstart by starting them indoors before the last frost.
Save Money: Buying seed packets is often cheaper than buying young plants from a nursery. After your first year of gardening, you can save some seeds from your vegetables, fruits, and flowers from this year for next year.
More Control: You have full control over the growing conditions, such as temperature and light, ensuring stronger, healthier plants.
2. Choose the Right Seeds
Selecting Seeds for Indoor Starting:
It is important to read the back of seed packets and to know your zone so that you start your seeds when you need to. This website can help you find your plant hardiness zone https://mapscaping.com/plant-hardiness-zone-finder. Not all plants are suited to being started indoors. Some plants, such as root vegetables (like carrots or radishes), do best when directly sown into the ground. However, many plants thrive when started indoors, including:
Vegetables: Tomatoes, peppers, broccoli, lettuce, and cucumbers. If you leave the rotting vegetables, sometimes their seeds will sprout for next year, saving you money!
Herbs: Basil, parsley, oregano, and cilantro. This herb seed kit is a good start; buying in bulk can help you save money.
Flowers: Marigolds, sunflowers, petunias, and zinnias. This set of seeds includes 35 flowers for attracting bees and butterflies while making your garden beautiful, bringing in the pollinators!
Check the seed packet or research online to see if the seeds you want to start are recommended for indoor planting. Some plants, like tomatoes and peppers, need a longer growing period, making them ideal for starting indoors.
3. Gather Your Supplies
What You’ll Need to Start Seeds Indoors:
Having the right tools and supplies makes the process much smoother. Here’s a list of the essentials:
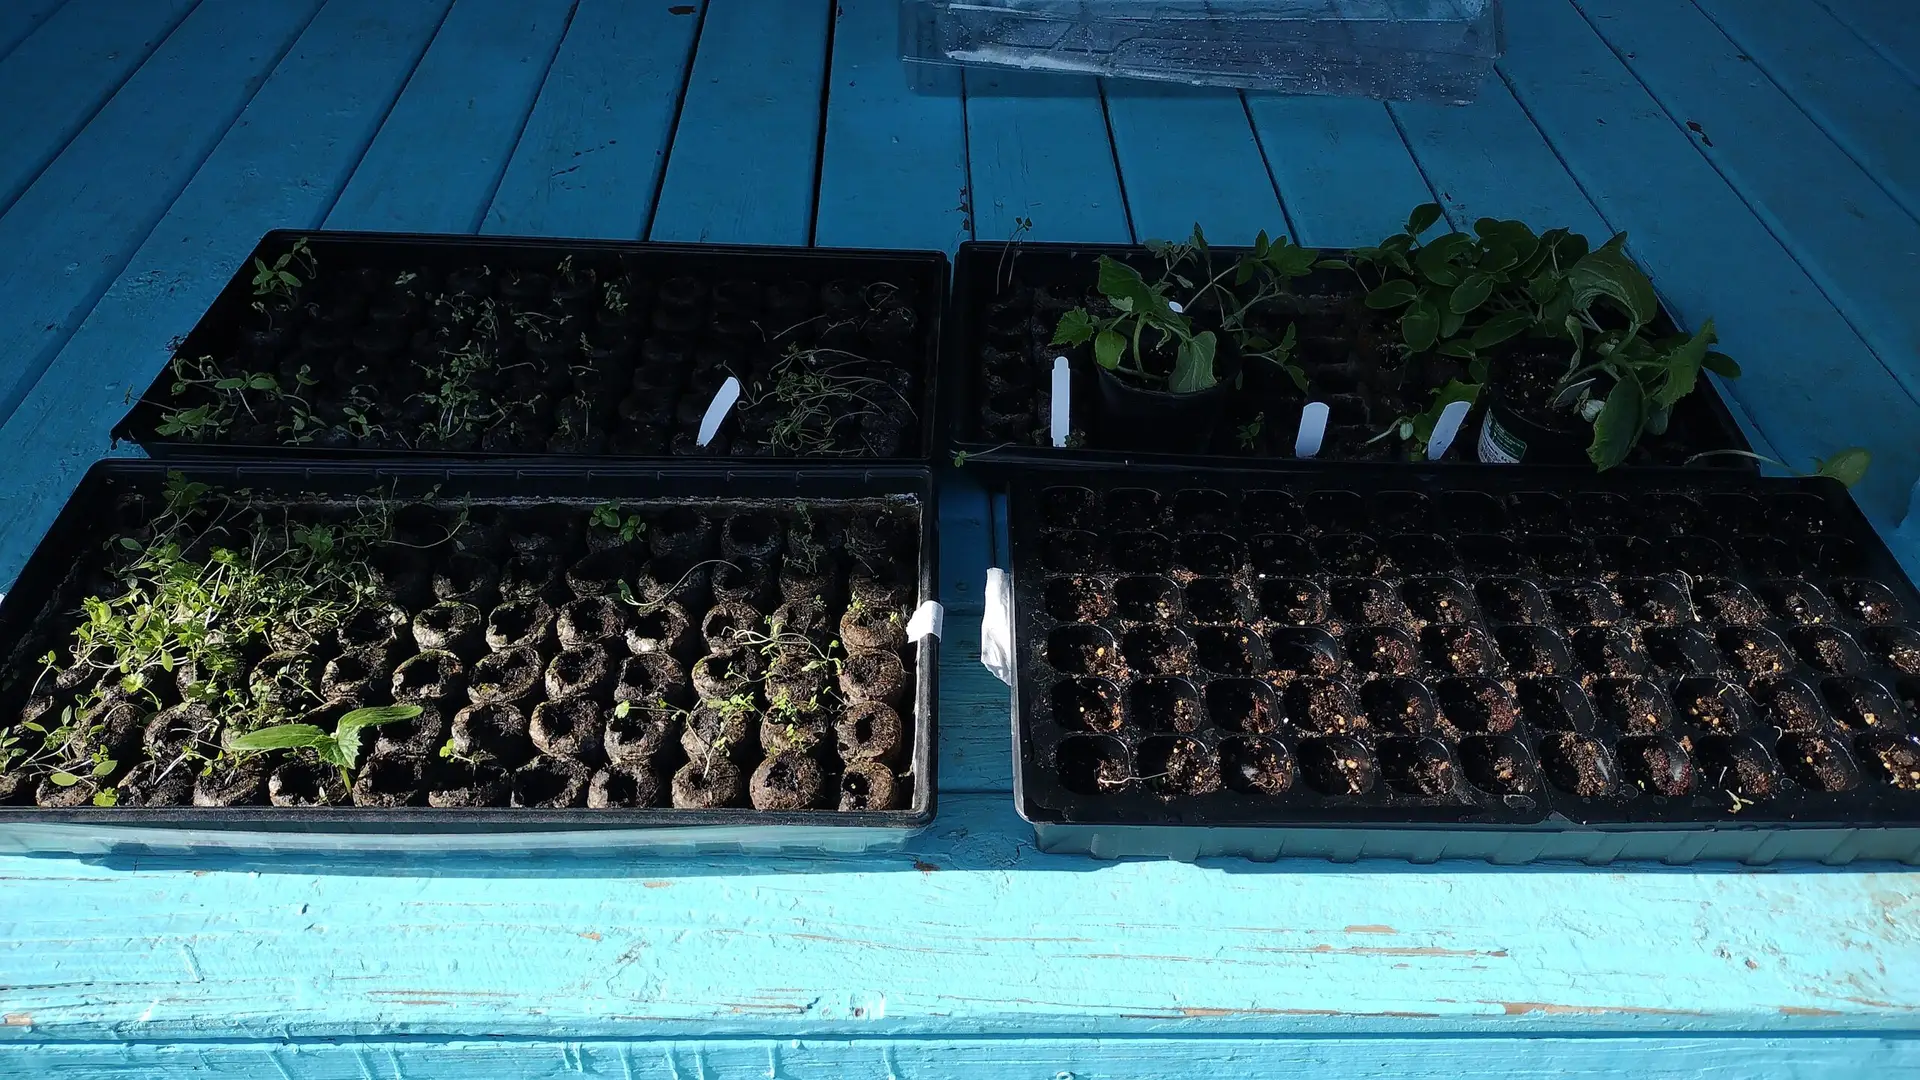
Seed Starting Trays or Pots: Use small containers with drainage holes to prevent overwatering. They also make little kits that include a tray with pellets, keeping it simple. The trays are reusable, and the pellets come in packs. You can also use recycled materials, like egg cartons or yogurt cups.
Seed Starting Mix: A light, well-draining mix designed for starting seeds. Avoid regular garden soil, as it can be too heavy and may not provide the proper nutrients for seedlings.
Seeds: Choose the seeds you want to start, based on the type of plants and your local growing season. Oftentimes, buying seeds in packs will help you save money.
Grow Lights or Sunny Window: Seeds need 12-16 hours of light a day, so either a sunny windowsill or grow lights will be necessary, especially in winter. I use these grow lights for my indoor plants and when I start my seeds for my garden. These bulbs can go into a variety of lamps and pendant lights, which work nicely. There are many types of lights to choose from.
Humidity Dome: A clear cover or plastic wrap can help retain moisture, promoting germination. Many greenhouse kits come with a humidity dome, and you can also use the clear zip bags that some fitted sheets come in as a humidity dome. You can also cut plastic bottles in half and use the bottom for dirt and the top as a humidity dome.
Watering Can with Fine Spray: A gentle watering method prevents disturbing the seeds while keeping the soil moist. I use spray bottles, I have hard water, and these bottles take longer to become clogged from the hard water.
4. Planting the Seeds
How to Plant Seeds Indoors:
Fill Your Containers: Fill your seed trays or pots with seed-starting mix. Lightly press the mix down, but don’t compact it too much—seeds need space to grow roots.
Plant the Seeds: Follow the seed packet instructions for planting depth. In general, plant seeds about 2-3 times deeper than their size. For smaller seeds, gently scatter them on the surface and lightly press them into the soil.
Water Gently: Use a fine mist or a gentle watering can to moisten the soil. Keep it moist but not soaking wet.
Cover the Seeds: Cover the containers with a humidity dome or plastic wrap to create a mini greenhouse effect. This helps maintain warmth and moisture while the seeds germinate. I brought in a stray cat during the winter, and she knocked off my humidity dome and ate my plants after they finally sprouted up. I found placing these trays inside these clear totes prevented her from doing it again. The totes are also stackable, making it easier to make space to grow seeds.
5. Provide the Right Conditions for Germination
Temperature and Light for Growing Seeds Indoors:
Temperature: Most seeds germinate best in a warm environment, typically between 65-75°F (18-24°C). You can place the seed trays on a heating mat if your home is cooler.
Light: After germination, your seeds will need plenty of light. If you don’t have access to a sunny windowsill, invest in full-spectrum lighting to help provide light. Make sure the seedlings get 12-16 hours of light a day for strong, healthy growth. If you are like me and forget to turn on the lights and turn them off, there are mechanical timers that can remember for you.
Watering: Keep the soil consistently moist, but not soggy. Use a gentle spray to avoid washing away seeds or disturbing the delicate seedlings.
6. Transplanting Seedlings
When to Move Your Seedlings Outdoors:
Once your seedlings have developed strong roots and a few sets of leaves (usually after 6-8 weeks), they’ll be ready for the outdoors. However, you’ll want to harden them off first to help them adjust to outdoor conditions:
Gradual Exposure: For about 7-10 days, gradually expose your seedlings to outdoor temperatures by placing them outside for a few hours each day. Start in the shade and slowly increase the amount of sunlight they get. These totes also make taking the plants outside gradually easier, along with preventing animals from eating them, such as stray cats and raccoons.
Watch the Weather: Wait until all danger of frost has passed before transplanting. Make sure your soil is warm enough for planting, typically above 50°F (10°C) for most plants.
Transplant with Care: When you’re ready to move your seedlings outdoors, transplant them on an overcast day or in the evening to reduce stress. Gently remove the seedlings from their containers and plant them into the soil at the same depth they were in the container.
7. Troubleshooting Common Issues
Common Problems with Starting Seeds Indoors and How to Fix Them:
Leggy Seedlings: If your seedlings are tall, thin, and weak, they may not be getting enough light. Move them to a sunnier spot or invest in grow lights.
Damping-Off Disease: This fungal disease can cause seedlings to wilt and collapse. Avoid overwatering, and make sure your containers have good drainage.
Stunted Growth: If your seedlings aren’t growing well, check the temperature, water, and light. Seedlings can also become root-bound if they’re left too long in their containers without transplanting.
Conclusion: Starting seeds indoors is a rewarding way to get a head start on your garden and ensure a successful growing season. By selecting the right seeds, providing the proper environment, and following a few simple steps, you’ll be well on your way to growing healthy, thriving plants. With a little patience and care, you’ll soon see your seeds sprout and grow into beautiful plants ready to be transplanted into your garden!
April 22, 2025
